Tuesday, September 9, 2008

Favorite Food Gift - Sand Art Brownies - Trish Berg

I love giving food gifts at Christmas time. It is like sharing a piece of homemade love with someone.

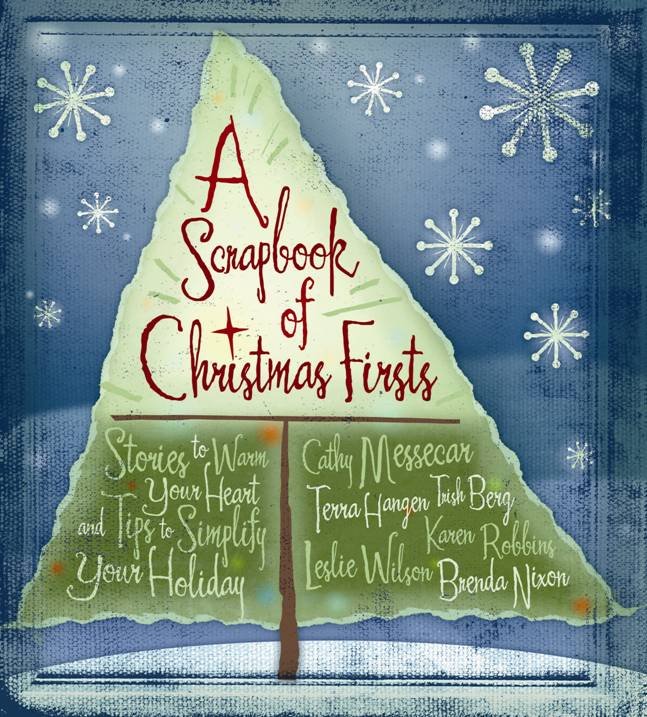
In Chapter 4 of A Scrapbook of Christmas Firsts, we were asked to share our favorite food gift, but not the recipe. So, here is the recipe for my Sand Art Brownies from page 54.

I love giving these to my children's school teachers as well. It is like home-baked brownies in a jar. And they are an inexpensive way to say thank you to someone like a teacher, neighbor or friend, around the holidays.

You will need some wide mouthed mason/canning jars, quart size. And I like to decorate each jar with a cut square of Christmas fabric on the lid tied with a ribbon to make it festive as well.

Enjoy the journey- Trish
Psalm 118:24
http://www.trishberg.com/

Sand Art Brownies (Trish Berg)
PREP TIME 20 Min
READY IN 20 Min
Yield: 1 jar which makes 1 9x9 inch pan of brownies

INGREDIENTS:
5/8 cup all-purpose flour
3/4 teaspoon salt
1/3 cup unsweetened cocoa powder
1/2 cup all-purpose flour
2/3 cup packed brown sugar
2/3 cup white sugar
1/2 cup semisweet chocolate chips
1/2 cup vanilla baking chips
1/2 cup walnuts

DIRECTIONS:

  1. In a clean, wide mouth 1 quart mason/canning jar, layer the ingredients in the order given.
  2. Attach a decorative tag to the out side of the jar with the following directions. (Hint: You can print what is here or cut and paste it into Word to make it simpler to label jars.)

Sand Art Brownies

  1. Preheat oven to 350 degrees F
  2. Grease one 9x9 inch square baking pan.
  3. Pour the contents of the jar into a large bowl, and mix well.
  4. Add 1 teaspoon vanilla, 2/3 cup vegetable oil, and 3 eggs.
  5. Beat until just combined.
  6. Pour the batter into the prepared pan, and bake in the preheated oven for 25 to 30 minutes.

Monday, September 8, 2008

These are a Few of Our Favorite Things


In each chapter of A Scrapbook of Christmas Firsts, we have categories of ideas for Christmas celebrations. One of those is a list of "Our Favorite Things." In Chapter Four we list our favorite homemade food gifts, and we're gifting you with those recipes today.

Mine is Cherry Biscotti. Last year, I layered the dry ingredients in a jar, attached the recipe and gave them to my friend Doris. She and her granddaughter baked the biscotti one day during Christmas vacation. This is one of our favorite biscotti mixes to give away. It's tasty with a cup of bold roast coffee or good with a cup of gently flavored hot tea.

What homemade food gift do you like to give away? A suggestion, gift a copy of A Scrapbook of Christmas Firsts and include the ingredients to make one of our Cookie Canister recipes found in each chapter. The picture was taken the day I received my first copy of our book. Yippee!


Cherry Biscotti / Cathy


7-8 Tbs. of softened butter
2 eggs
2/3 cup sugar

2 cups flour

2 tsp. baking powder

2 tsp. cinnamon

¾ cup chopped dried cherries

¾ cup chopped pecans

Preheat oven to 375 degrees. Cream butter, eggs and sugar. Add flour, baking powder and cinnamon. Add the rest of ingredients. Mix dough with hands. Shape into two loaves: 9 inches long by 2 inches wide. Bake on greased cookie sheets for 25-30 minutes until toothpick inserted in center comes out clean. Cool 1 hour.
Preheat oven to 325 degrees. Cut each loaf diagonally into ½ inch thick slices using a serrated bread knife. Place on ungreased cookie sheet. Bake for 8 minutes, turn over and bake for 8-10 minutes until biscotti is dry and crisp. Store in airtight containers.

Saturday, September 6, 2008

Cherry Cheesecake Tarts

While I would not classify my mother as a gourmet cook, she loved to make things that were a bit labor intensive. When she made potato salad every little piece of vegetable was cut and diced just so in bite-sized pieces. This bite-sized tarts recipe was one of her favorites to make and one of our favorite things to eat. It is great for a party--looks delicious and is easy finger food.

You will need mini-muffin pans and paper inserts for this as well as shopping around for vanilla wafer cookies that are small enough to fit in the bottom of each cup. I think some of the 100 calorie count boxes may have the right size. The last time I tried this recipe I found Nabisco had increased the size of their cookie.

Cherry Cheesecake Tarts

Vanilla wafers
Cherry pie filling (Mom always bought Thank You brand)
Mini tart liners

Set liners into mini-muffin pan and place one wafer (cookie) in the bottom of each cup.

Cream together:
2 8 oz packages of cream cheese
3/4 cup sugar
1 Tbl. vanilla
1 Tbl. lemon juice
2 eggs

Beat at high speed for 5 minutes. Place 1 Tbl. of mixture in each lined cup of muffin pan. Bake at 350 degrees for about 15 minutes until set. Add a cherry with a bit of filling to the top of each.

Now just try to keep them from going straight to your waist!

Friday, September 5, 2008

Molasses Gingerbread Men

Run, run, as fast as you can, you can't catch me, I'm the gingerbread man.

It is so much fun to set aside a morning or afternoon and have a family event making gingerbread men cookies, and then decorating them with frosting and sprinkles.
This is a recipe from my step mother, Barb, who got it from her mom.

Molasses Cookies
1 cup sugar
1 cup butter
2 eggs
1 cup dark molasses
2 teaspoons cinnamon
2 teaspoons ginger
1 teaspoon baking soda
1 teaspoon cream of tartar
3 and 1/2 cups flour
1 cup sour cream
Cream butter, add sugar and mix well.
Add beaten eggs, molasses, flour mixed and sifted with soda and spices, alternately with sour cream and the cream of tartar.
Add enough flour to make a soft dough. Chill.
Knead on floured surface and roll out about 1/4 inch thick.
Cut with cookie cutters. Use all the designs you like, including gingerbread boy and girl, reindeer, Christmas tree, star, camel, Santa Claus, and more.
Bake on greased sheet in 350 degree oven 15 or 20 minutes.

For frosting stir powdered sugar and a little margarine and milk until blended.
Add food coloring to several different bowls of frosting, and put on the work table all of the sprinkles you can buy. Chocolate sprinkles are our favorite and the green and red sugar sprinkles.

In my family we spread on the frosting and then add artistic touches of the sprinkles, making realistic gingerbread people, Christmas trees, candy canes, etc.
They are almost too gorgeous to eat! Almost but not quite.
Half the fun is tasting as you add the frosting and sprinkles.

Thursday, September 4, 2008

Leslie's Favorite Family Recipe

An old Priest (Leslie’s grandmothers’s maiden name) family (favorite!) recipe

My maternal grandmother, Nana (Remember the one who lived to 103?) used to make crescents every Christmas. Traditionally known as wedding cookies, we didn’t have to wait for someone to get married to enjoy these melt-in-your mouth treats. My mom and grandmother rolled the sugary balls of dough in their hands, expertly shaping the ends to a point, then bending them to the form of a crescent moon before baking. My job was the most important: sprinkling them with powdered sugar. We—and, by that, I mean Mom and Nana—filled two giant Tupperware® cake-takers of the buttery treats.

Pecans—good.
Powdered sugar—good.
Butter—really good.
What’s not to love in crescents?

See the recipe below.

Crescents (Wedding Cookies)

Ingredients:
2 sticks of butter or margarine
1 cup powdered sugar
½ tsp vanilla
¼ tsp almond extract
3 cups all-purpose flour
1 cup chopped pecans or other nuts

Directions:
Preheat oven to 325°.

Hand mix together until well blended:
butter, softened
½ cup of powdered sugar
vanilla
almond extract

Slowly add sifted flour to the mix (You don’t usually have to use all of it.) Mix dough to resemble soft “play-dough,” adding flour as you mix.

Add pecans. Pinch off a dough ball approximately one inch in diameter. Use the heat from the palm of your hand to soften as you roll into a small “cigar” shape with the ends slightly pointed. Curve as you place dough ball onto cookie sheet.

Bake 30 minutes until tips are slightly browned. Sift powdered sugar onto baking board or waxed paper and place crescents onto the sugar. Sprinkle additional powered sugar on top.

Wednesday, September 3, 2008

Kids In the Kitchen - Oh My!

by Brenda Nixon

Did you know that cooking with kids helps develop their fine motor and language skills, and their understanding of math and physics? Yep! When children cook they
  1. use their hand, wrist and finger muscles;
  2. hear words not used in ordinary conversation;
  3. learn fractions and counting; and
  4. watch what happens when foods bake or chill.

I have more fond memories than I can count baking with my grandma. She allowed my creative love for messin' in the kitchen to bloom. Mom also encouraged my cooking skills (but, you know how moms always want you to clean up, but grandmas don't care). Grandma would often just sit at the table and watch me, answering my questions and chattering. She always made me feel like whatever I did was right. Kids need an admirer at times.

During these fun-filled holidays, keep your kids in the kitchen! You may be amazed how much they learn during "play." Plus, you'll grow memories to look back on. There are more tips and ideas for being a great parent (or grandparent) in my newest book, The Birth to Five Book: Confident Childrearing Right From the Start (Revell), available in all bookstores.

For more recipes that you might want to try with your kids, see A Scrapbook of Christmas Firsts. This may be your first year to bake something together.

Tuesday, September 2, 2008

Recipe for Chocolate Biscotti - by Trish Berg


Some memories stay with you for a lifetime, and for me , a lot of those memories involve smells, tastes or feelings.

Christmas memories tend to revolve around the taste buds for me. It is such a time of sharing meals and yummy desserts, and a lot of love.

I remember as a little girl when we would visit my paternal grandparents in Brooklyn, New York. They were 100% Italian, through and through. We would eat the meal, and then sit around the huge dining room table as the adults would talk and talk (argue and argue over nothing much at all) and sip espresso while eating Italian pastries and desserts.

And they always had Biscottis there to dip in their coffee.

My grandparents have both passed away long ago, and my dad died in 1997 after a long battle with pneumonia. And with their passing, my Italian heritage seems to have gone away as well.

I miss them. Even though life at their house was never perfect, full of loud "discussions" and family struggles, it was also full of love.

And for a city-girl-gone-country mom like me, living on a farm in Ohio, I enjoy keeping some of my Italian heritage around in little ways.

So a few years back, I found a fantastic recipe for Chocolate Cherry Biscotti's, and ever since then, it has become a tradition for our family.

I wanted to share not only this recipe with you all, but a new one I found online that I am going to try this year as well. My recipe is for a dark chocolate biscotti, and the new recipe is truly colorful and Christmas looking with it's red and white.

This year, I will be making both Biscotti's, and dipping them in my evening coffee as I watch the snow fall outside my window.

And maybe, just maybe, I'll pull out our old photo album, and invite some wonderful memories to join me.

Blessings to you all, Trish
www.TrishBerg.com

*************************************
Dark Chocolate Biscotti (Trish Berg)

Prep Time: 20 minutes
Bake time: 55 minutes
Yield: 46 cookies

INGREDIENTS:
2 1/2 cup flour
1/4 cup cocoa
1 Tbsp. Baking powder
1 cup sugar
3 eggs
1 tsp. vanilla
1/8 tsp. salt
1 cup chocolate chips
1/2 stick butter, melted
1 cup chopped almonds (optional)
1 cup crasins, or dried cherries (optional)

DIRECTIONS:
  1. Heat oven to 350 degrees.
  2. Line 2 baking sheets with foil, then coat foil with Pam.
  3. Mix all wet ingredients. Mix all dry ingredients in separate bowl.
  4. Slowly add wet to dry ingredients and blend with wooden spoon.
  5. Divide dough in half. Shape each half into logs, about 2 1/2 by 15 inches each.
  6. Bake for 35 minutes.
  7. Remove from oven, and with serrated knife, cut into slices about 1 inch think.
  8. Bake slices on their side for 8 to 10 minutes, or until bottoms begin to brown. Turn, and bake on other side an additional 5 minutes, or until browned and crisp.
  9. Let cool and dry for 30 minutes. Store in air tight container, and enjoy with coffee.

****************************

Chocolate Cherry Biscotti (www.AllRecipes.com)

PREP TIME 25 Min
COOK TIME 40 Min
READY IN 1 Hr 15 Min
Original recipe yield 3 dozen

INGREDIENTS:
1/2 cup butter, softened
3/4 cup white sugar
3 eggs
2 teaspoons almond extract
3 cups all-purpose flour
2 teaspoons baking powder
1/2 cup chopped candied cherries
1/2 cup mini semi-sweet chocolate chips
1/2 cup chopped white chocolate

DIRECTIONS:

  1. Preheat oven to 350 degrees F. Grease a large cookie sheet.
  2. In a large bowl, cream together the butter and sugar until smooth. Beat in the eggs one at a time, then stir in the almond extract.
  3. Combine the flour and baking powder; stir into the creamed mixture until just blended.
  4. Mix in candied cherries and mini chocolate chips.
  5. With lightly floured hands, shape dough into two 10 inch long loaves.
  6. Place rolls 5 inches apart on the prepared cookie sheet; flatten each to 3 inch width.
  7. Bake for 20 to 25 minutes, or until set and light golden brown. Cool 10 minutes.
  8. Using a serrated knife, cut loaves diagonally into 1/2 inch slices. Arrange slices cut side down on ungreased cookie sheets.
  9. Bake for 8 to 10 minutes, or until bottoms begin to brown. Turn, and bake an additional 5 minutes, or until browned and crisp. Cool completely.
  10. Melt white chocolate in the microwave, stirring every 20 to 30 seconds until smooth. Drizzle cookies with melted white chocolate. Store in tightly covered container.